

Manage your phone system
Who can do this: Owners and Office Managers. Other staff can look at these pages but can’t change anything. To get a new phone number or move an existing one to NixDent, contact NixDent.
This page is a map of the setup pages. The daily guide for answering and placing calls is Make and take calls with NixDent Phone.
Where everything is
Section titled “Where everything is”Go to Phone. The tabs are Live Board, Switchboard, Inbox and Admin. Under the tabs is a row of links: Call history, Reports & Call IQ, Schedules, Line health, Extensions, Desk phones, Contacts, Ring groups, Fax, Softphone, E911 and Numbers.
The Admin tab shows the office’s phone numbers (and where each one rings), the extensions with their online status, and a list of phone features for the office. A locked feature isn’t enabled for your plan; contact NixDent.
Set it up in this order
Section titled “Set it up in this order”- Extensions. One per person or phone.
- Ring groups. Teams that ring together.
- Schedules. Open and closed hours.
- Sound clips. Your own greetings.
- Call flows. What happens when a call comes in.
- Numbers. Point each number at a call flow, ring group or extension.
- E911 address. So emergency services know where you are.
Extensions
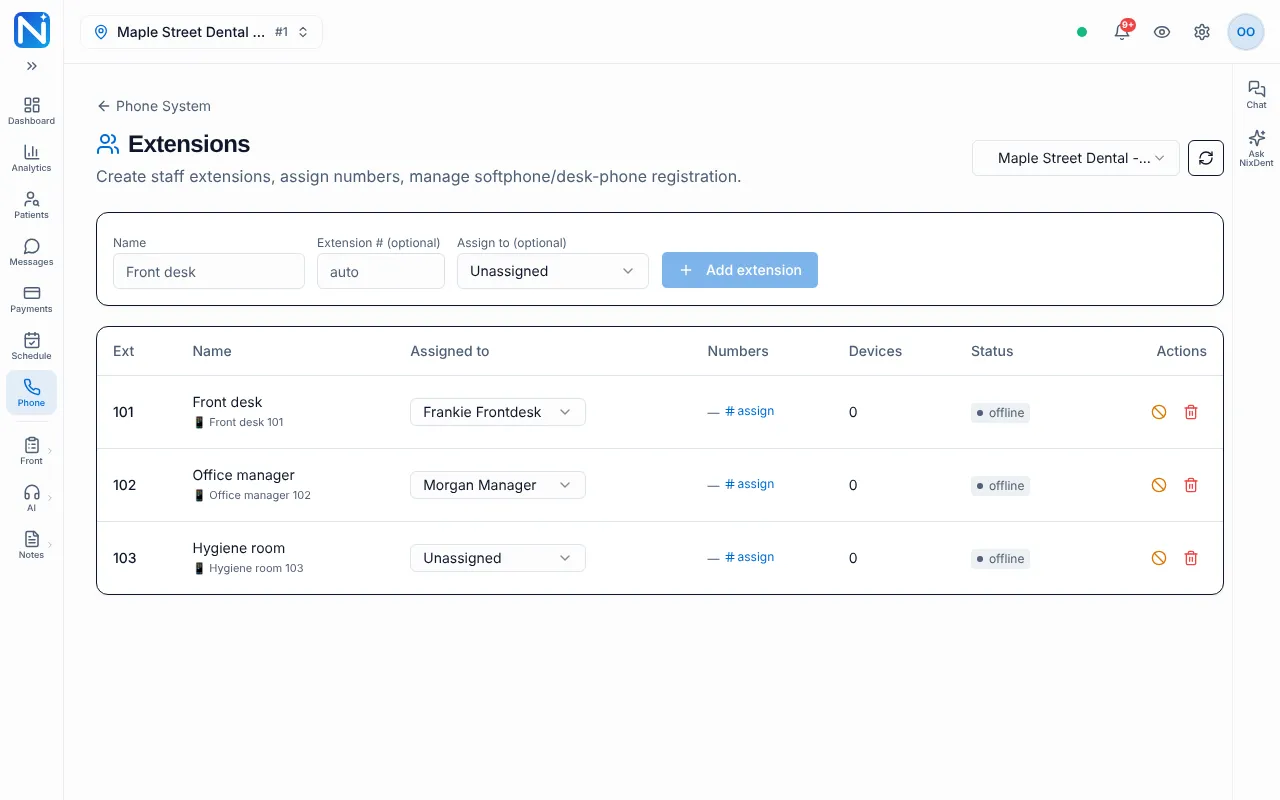
Section titled “Extensions”Phone → Extensions. Create extensions, assign them to a person, assign numbers, and manage browser-phone and desk-phone registration.
- Pick the Location.
- Enter a Name (the box suggests “Front desk”). Extension # is optional; leave it as “auto” to get the next number automatically. Assign to is optional.
- Click Add extension.
On each row you can point at the name and click the pencil to rename it and set a Desk-phone label. Use the Assigned to menu to give the extension to a team member, click # assign under Numbers to pick a number, or click the circle-with-a-line button (Disable, later Re-enable) or the trash can (Delete). Deleting asks you to confirm and can’t be undone.
A person starts using the browser phone by opening Phone → Softphone once. See Make and take calls with NixDent Phone.
Ring groups
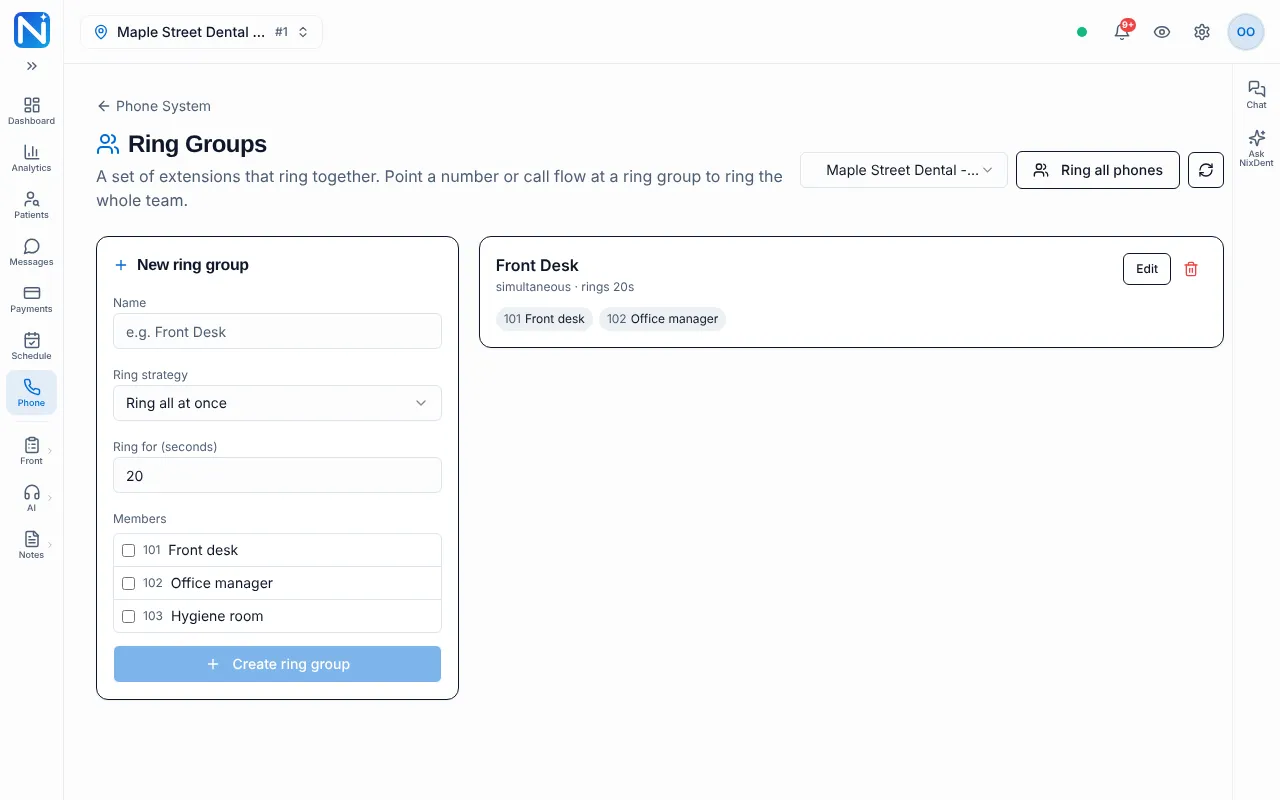
Section titled “Ring groups”Phone → Ring groups. A set of extensions that ring together.
- In New ring group, enter a Name (the box suggests “e.g. Front Desk”).
- Choose a Ring strategy: Ring all at once or Ring one at a time.
- Set Ring for (seconds). It starts at 20.
- Tick the Members.
- Click Create ring group.
Edit or delete a group later with Edit and the trash can. Deleting asks you to confirm, and any call flow or number pointing to the group will need to be re-routed. The Ring all phones button at the top right is a shortcut that creates a group named “All Office Phones” with every active extension.
Schedules (business hours)
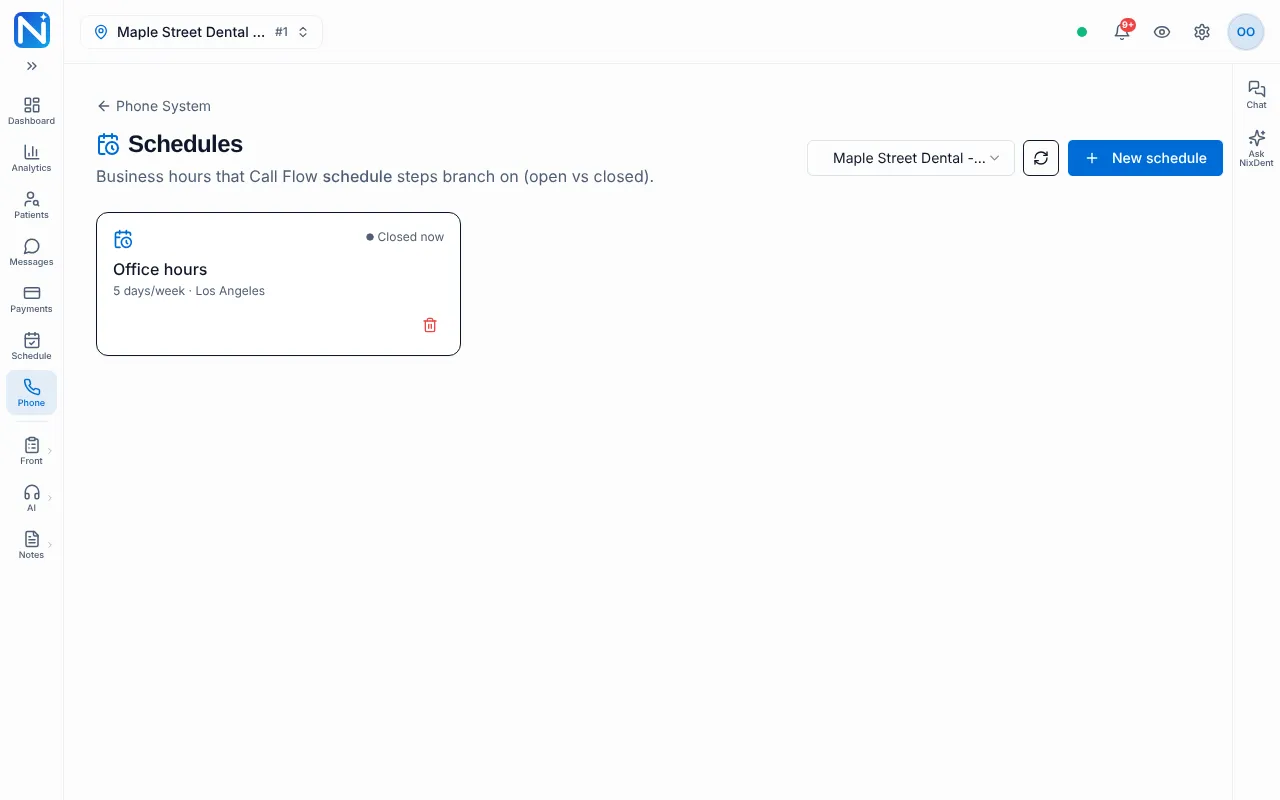
Section titled “Schedules (business hours)”Phone → Schedules. A schedule is your phone hours: for each day, whether you’re open and from what time to what time, in your time zone. Call flows use schedules to treat open and closed times differently. Each card shows Open now or Closed now, the name, and a summary such as “5 days/week”. Click New schedule to add one. Save stores your changes.
Closures you set in Settings → Hours and closures already count as phone holidays. Add a date under Extra phone-only holidays only if the phones should close on a day the office is open. See Hours and closures.
Sound clips
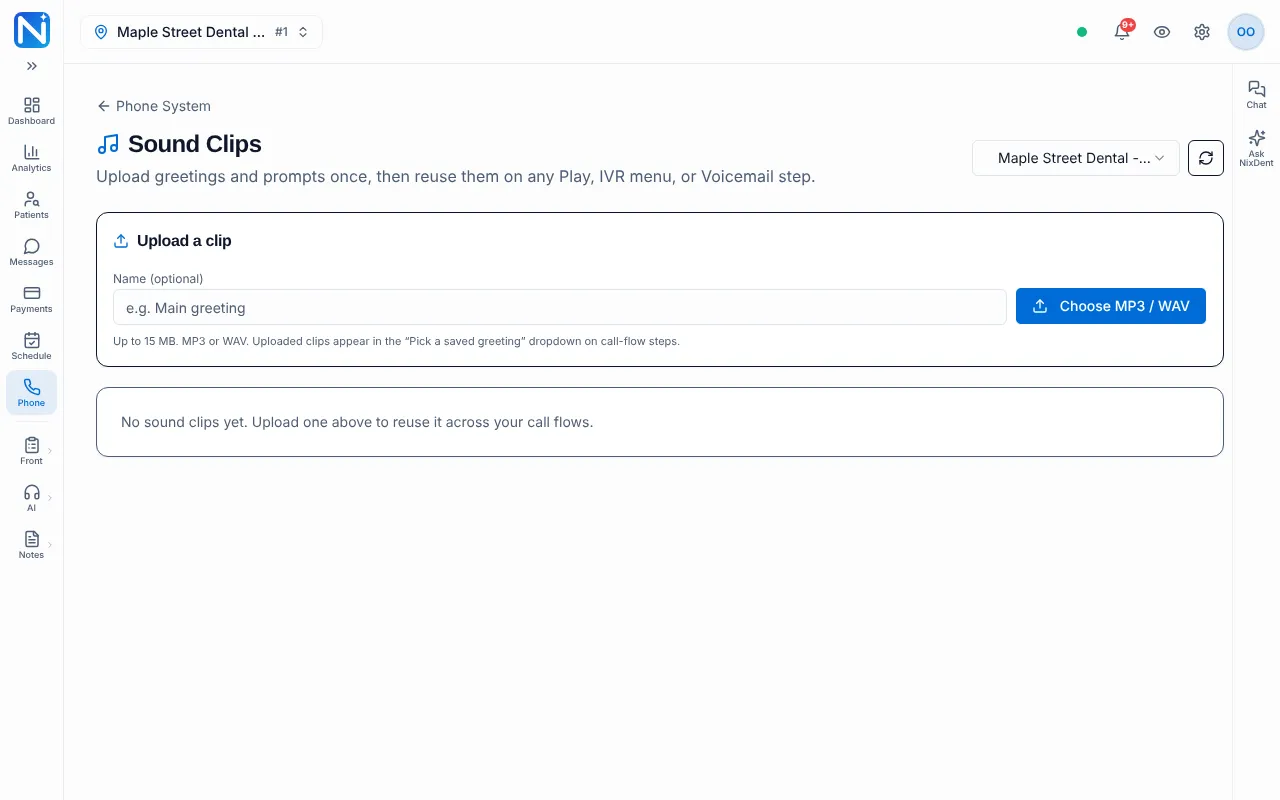
Section titled “Sound clips”Phone → Sound clips. Upload greetings and prompts once, then reuse them in any call-flow step.
- Under Upload a clip, give it a Name (optional), for example “Main greeting”.
- Click Choose MP3 / WAV and pick a file (up to 15 MB).
Uploaded clips appear in the “Pick a saved greeting” menu on call-flow steps. You can rename or delete a clip. If you delete a clip that a call-flow step uses, that step falls back to computer-spoken text.
Call flows
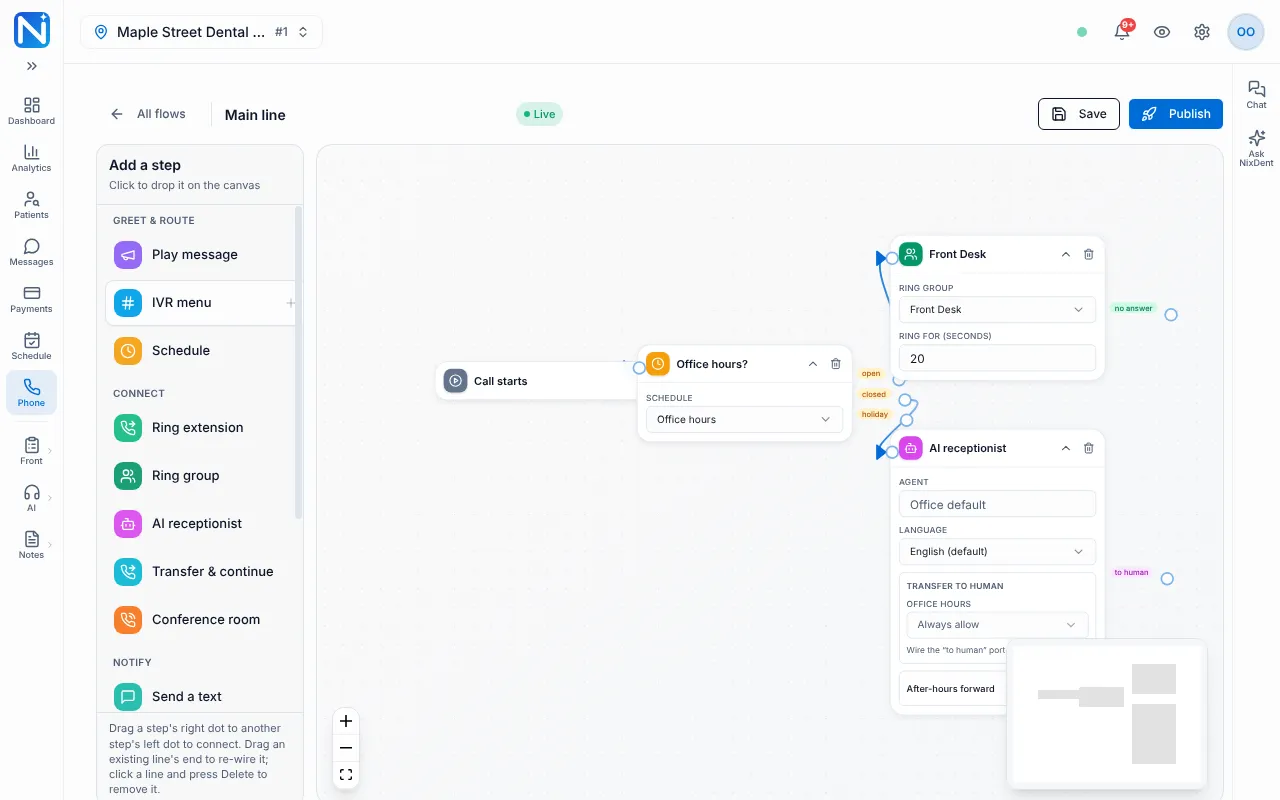
Section titled “Call flows”Phone → Switchboard tab. This is a visual builder. Each call flow starts at Call starts, and you add steps and connect them.
| Step | What it does |
|---|---|
| Play message | Speaks a message you type, or plays an uploaded sound clip, then continues. |
| IVR menu | The caller presses a key to choose where to go. |
| Schedule | Branches on open hours, closed hours or a holiday. |
| Ring extension / Ring group | Rings one extension or a group. Has a “no answer” path. |
| AI receptionist | Hands the call to your AI receptionist. It can pass the call to a person (“to human”). |
| Send a text | Texts staff and/or the caller (for example a missed-call message), then continues. |
| Transfer & continue | Forwards to an outside number, and continues if there’s no answer. |
| Conference room | Puts the caller in a named conference room. |
| Wait | Pauses a few seconds, then continues. |
| Webhook | Sends call details to a web address, then continues. |
| Go to flow | Hands the call to another call flow. |
| Voicemail | Sends the caller to voicemail. |
| Hang up | Ends the call. |
- In the Add a step list on the left (grouped Greet & route, Connect, Notify, Flow and End), click a step to drop it on the canvas.
- Connect steps by dragging a step’s right dot to another step’s left dot. To remove a line, click it and press Delete.
- Click Save to keep your changes. Click Publish to make the flow live. A flow that isn’t valid can’t be published.
Numbers
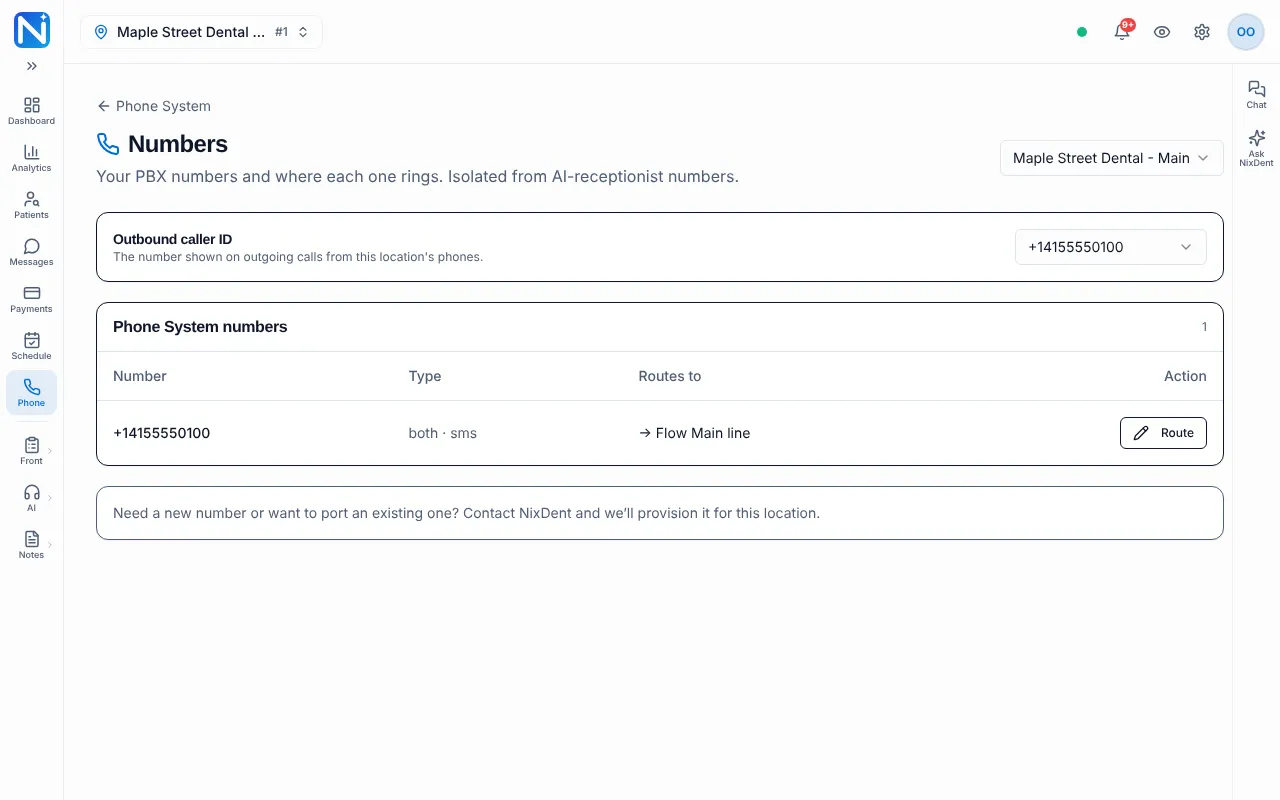
Section titled “Numbers”Phone → Numbers. Shows your phone numbers and where each rings. The table has Number, Type, Routes to and Action.
- Click Route on a number.
- Choose a destination: a call flow, ring group, extension, voicemail or an outside number.
- Save.
The Outbound caller ID menu at the top chooses which number shows on outgoing calls.
Numbers used by your AI receptionist or for texting aren’t part of the phone system. They’re listed separately under Other numbers at this location, and you route them elsewhere.
Desk phones
Section titled “Desk phones”Phone → Desk phones. Under Add a desk phone, enter its MAC address, pick an Extension and a Label, and click Add phone. Then point the phone’s setup to the provisioning address shown at the top of the page (the same address for every phone). The phone then configures itself. Phone settings for all phones at the office covers shared options such as time format, ringtone and backlight. These are technical settings; ask NixDent if you’re unsure.
E911 address
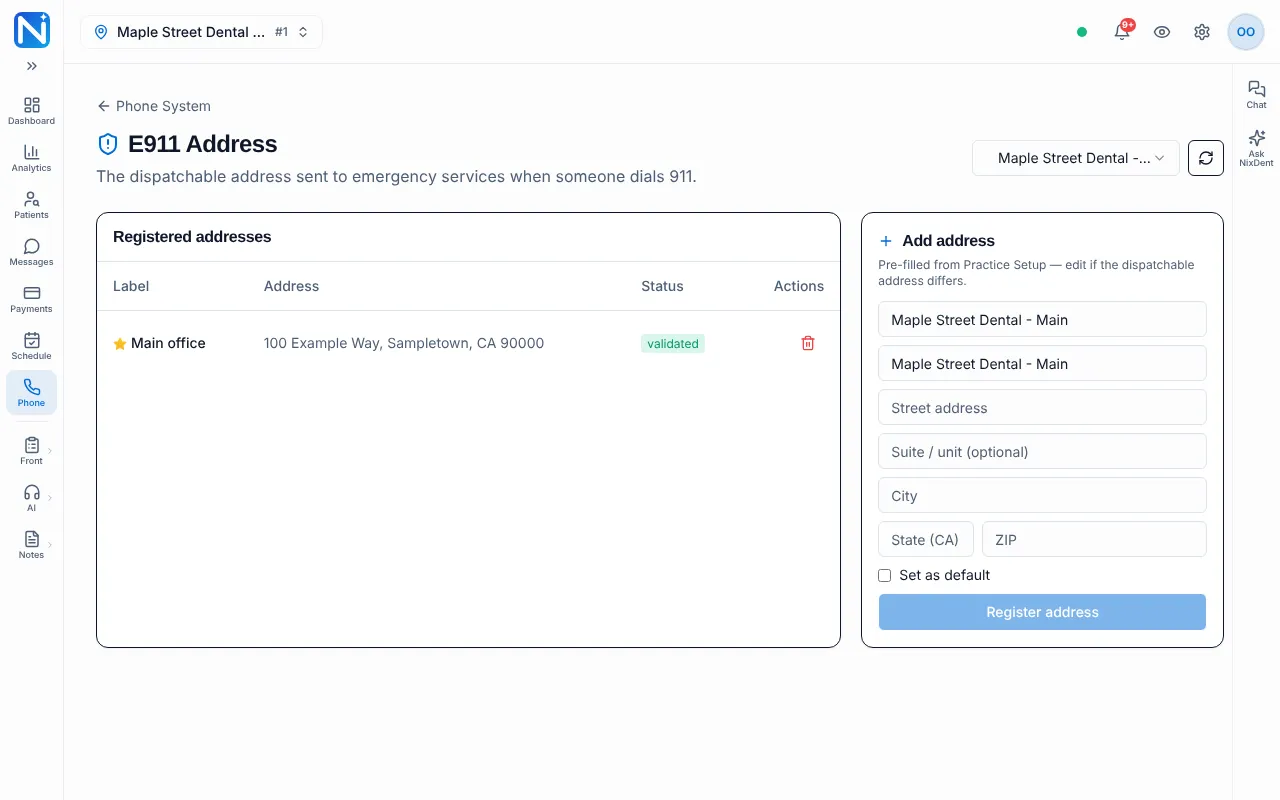
Section titled “E911 address”Phone → E911. The address emergency services receive when someone dials 911 from your phones. The Registered addresses table shows each address and its status (for example “validated”).
- Under Add address, enter a label, street, city, state and ZIP. It’s pre-filled from your practice details; edit it if the address emergency crews should go to is different.
- Tick Set as default if needed.
- Click Register address.
Keep this current, especially if you move or add an office.
Common problems
Section titled “Common problems”- A page shows an error or buttons do nothing. Your role may not allow changes, or a feature isn’t enabled for your plan.
- Calls ring nobody. Check the number’s Route, then check that the destination’s members are online (Admin tab → Extensions).
- People never get an extension. They need to open Phone → Softphone once.
What to do next
Section titled “What to do next”- Read Phone reports and Call IQ once calls are flowing.
- Teach the team the daily guide, Make and take calls with NixDent Phone.