

Rebook broken appointments
Who can do this: Anyone on your team.
Go to Front Desk → Broken Appointments, and pick the office at the top right.
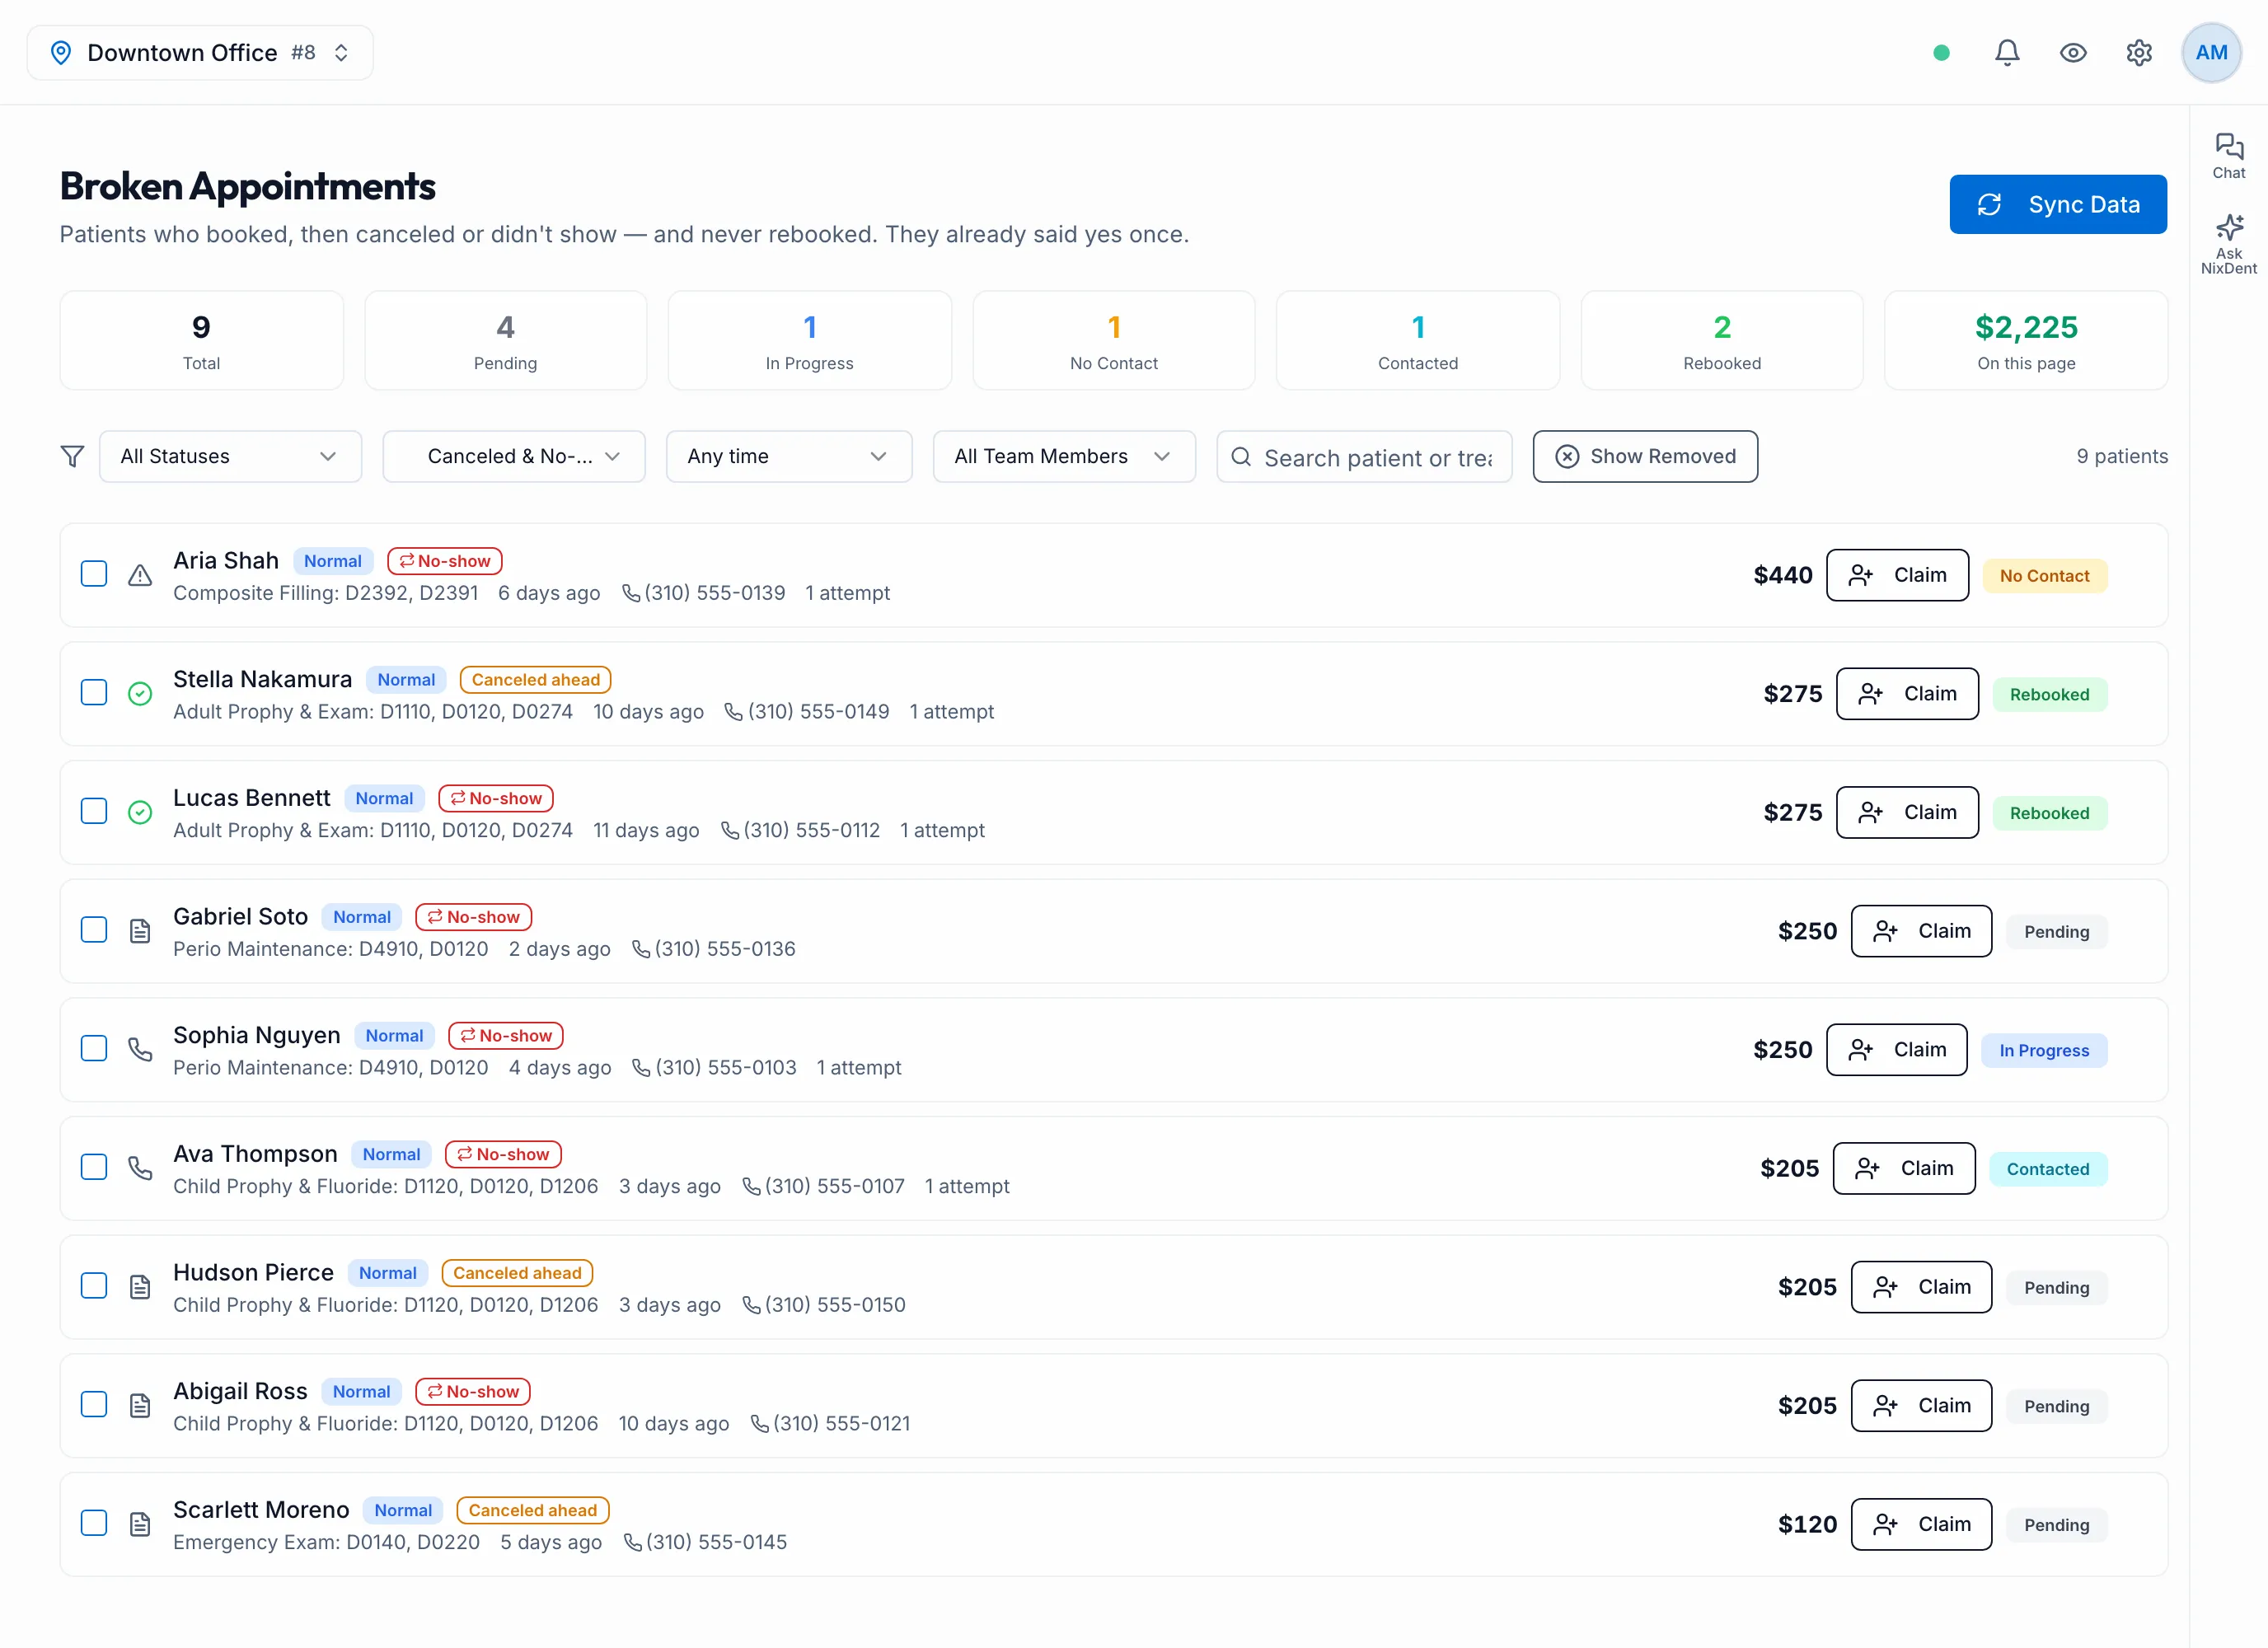
These are patients who booked, then canceled or didn’t show, and haven’t rebooked. They already said yes once, so they’re often the easiest to bring back.
How the list is built
Section titled “How the list is built”New breaks appear on their own within a couple of minutes of NixDent hearing about them from Open Dental. Click Sync Data if the list looks out of date. It rebuilds the list from the copy of Open Dental that NixDent already holds, and covers appointments broken in the last 12 months. If the data itself is stale, see How NixDent connects to Open Dental.
The first time you open the page with an empty list, NixDent starts a sync by itself. It can take up to about a minute. If the list is still empty, the page says nobody has an unrebooked broken appointment, with a Sync Now button. After a sync you see Sync Complete with the number on the list.
Each row shows what happened (Canceled ahead or No-show), when it broke, and the treatment that was on the appointment with its value. “Also planned” lists other treatment-planned procedures for that patient. The list is sorted by value, largest first, and On this page adds up the value of the rows you’re looking at.
An appointment moved to Open Dental’s Unscheduled list is always Canceled ahead. Otherwise the label comes from when Open Dental recorded the break compared with the appointment’s start time, so editing an appointment later can change it.
Every row has an Urgent, High or Normal badge next to the patient name. It reflects the value of the treatment that was planned on the broken appointment and how recently it broke. Older breaks rank lower.
Patients who rebook, or come back in, move to Rebooked on their own. Nobody has to tidy the list. Someone who breaks an appointment and already has another one booked isn’t added at all. If a patient marked Declined, Completed or Scheduled breaks another appointment later, the row returns to Pending.
Find the right patients
Section titled “Find the right patients”- Filter by status (All Statuses, Pending, In Progress, No Contact, Contacted, Rebooked, Completed, Declined), by what happened (Canceled & No-shows, Canceled ahead, No-shows), or by when it broke (Any time, Today, Yesterday, Last 7 days, Last 30 days, Last 90 days, Over 90 days ago, or Custom range…).
- My Tasks (under All Team Members) shows only rows assigned to you. Search with the Search patient or treatment box.
- Show Removed brings back removed patients.
Work a patient
Section titled “Work a patient”Click Claim on a row to make it yours. Click the row to open it.
- Call or email using the phone number and email shown.
- Under Add Follow-Up, pick an outcome and add a note. You can set a follow-up date.
- Click Save Follow-Up. It appears in Activity History.
The outcome updates the status: Rebooked Appointment → Rebooked, Patient Declined → Declined, No Answer or Left Voicemail → No Contact, Contacted - Spoke with patient or Callback Requested → In Progress.
Inside the row you can also Send To AI Campaign, change who it’s Assigned To, or Remove the patient from the list. Use Show Removed and Re-add to undo.
Hand patients to the AI
Section titled “Hand patients to the AI”Available if your plan includes Outbound Calls, and once a Default Broken Appointment Campaign is set in Outreach → Settings. See Set up AI calling campaigns.
- Tick the patients, then click Send N to AI Campaign. Or open one patient and click Send To AI Campaign.
- The AI calls during your calling hours, and each call is logged in Activity History.
To stop the AI calling someone, open them and click Remove from AI Campaign.