

Set up an iPad kiosk
Who can do this: Owners and Office Managers. Other team members see the iPad Kiosks card with Add kiosk, Set PIN and the trash icon greyed out.
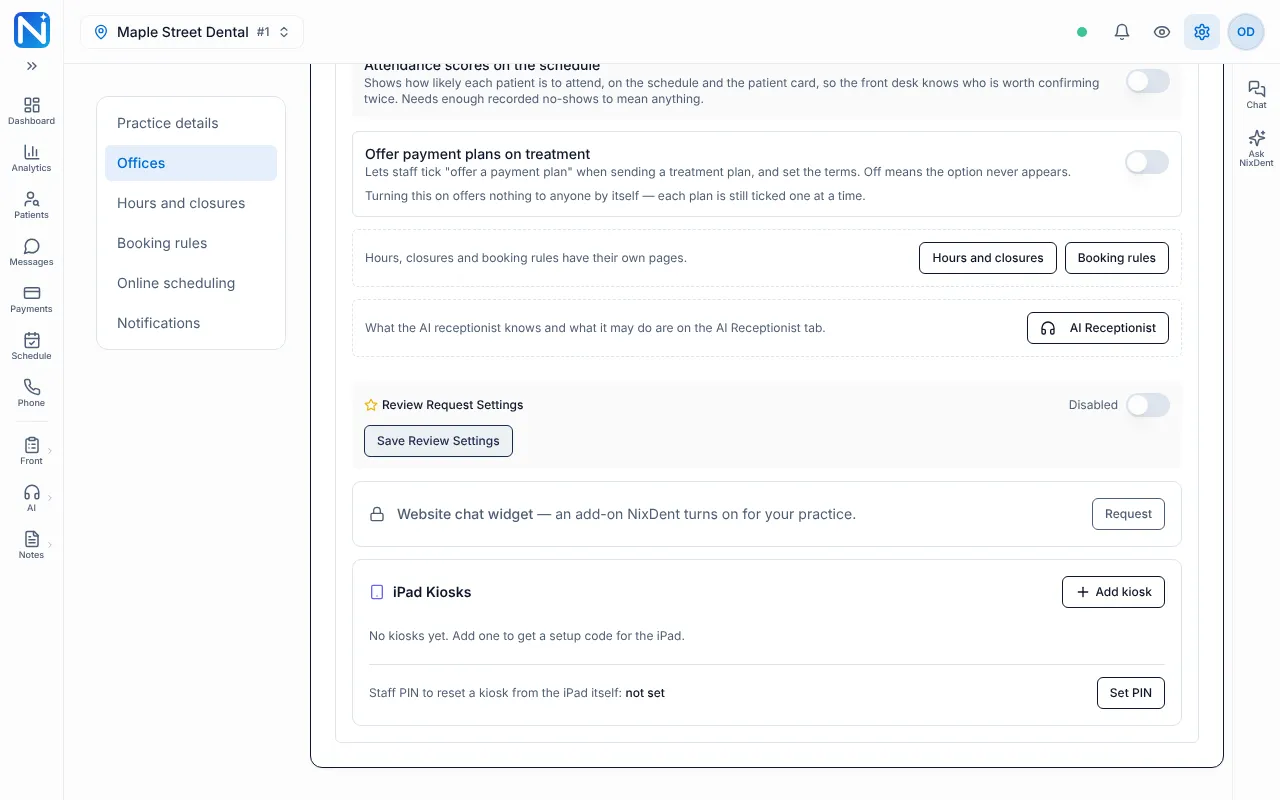
Go to Settings → Practice → Offices and find the iPad Kiosks card.
A kiosk is an iPad that stays in your waiting room (or a treatment room) and shows the patient a treatment plan you send. You add each iPad once.
Before you start
Section titled “Before you start”- The iPad needs Wi-Fi and internet access to floss.nixdent.com. If your network blocks websites, allow that address.
- Plan to keep the iPad plugged in. A screen that is lit all day drains the battery.
Step 1: Add the kiosk in NixDent
Section titled “Step 1: Add the kiosk in NixDent”- Go to Settings → Practice → Offices and find your office.
- In the iPad Kiosks card, click Add kiosk.
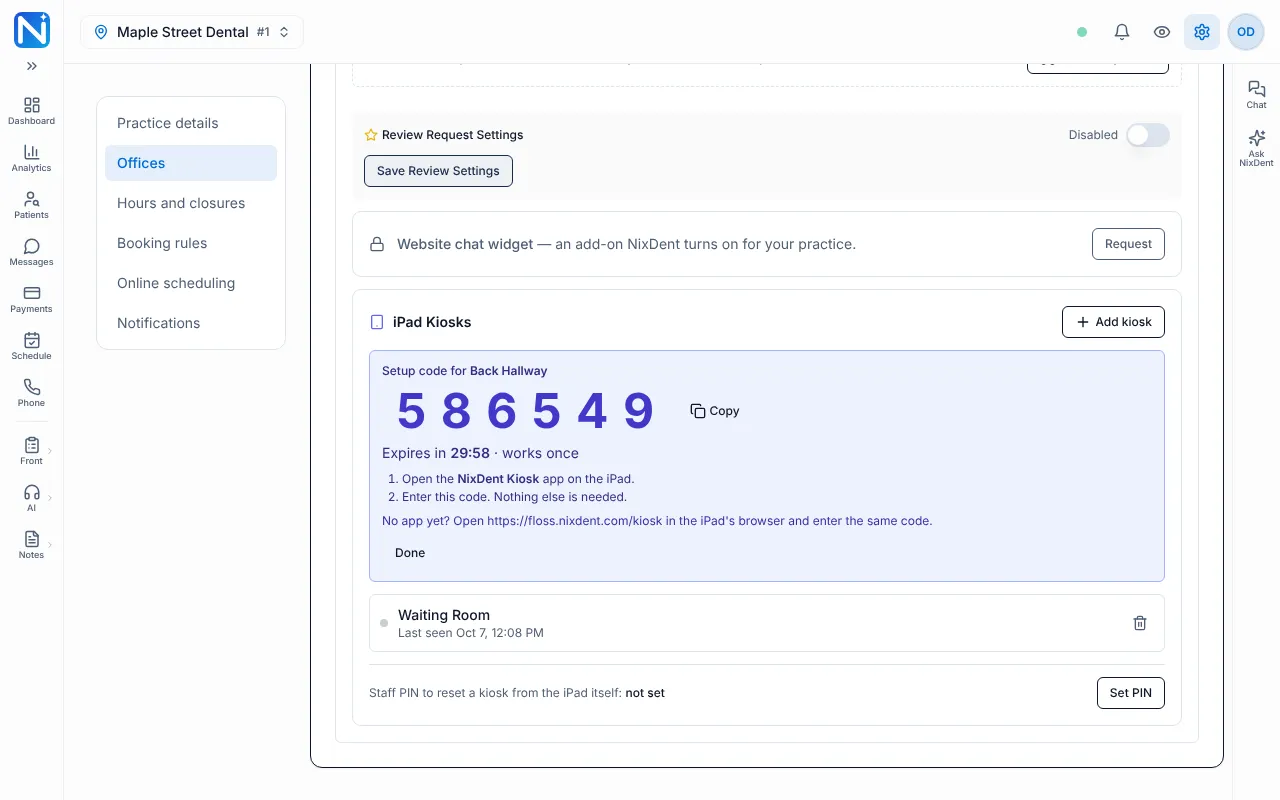
- Under Room name, type where the iPad will live, such as “Waiting Room”. Click Get setup code.
- A six-digit setup code appears with a Copy button and a countdown. It works once and expires in 30 minutes. Click Done when you have typed it in.
Step 2: Enter the code on the iPad
Section titled “Step 2: Enter the code on the iPad”- Open NixDent Kiosk on the iPad.
- Enter the six-digit code.
- Back in NixDent, the kiosk shows a green dot and Online.
If you don’t have the app yet, the setup card shows a web address to open in the iPad’s browser (floss.nixdent.com/kiosk). Enter the same code there.
Step 3: Keep the iPad awake and quiet
Section titled “Step 3: Keep the iPad awake and quiet”In the iPad’s Settings app:
- Display & Brightness, Auto-Lock: Never.
- Focus (Do Not Disturb): on.
- Notifications, Show Previews: Never, so no message can appear in front of a patient.
- Battery, Low Power Mode: off.
Step 4: Lock the iPad to the kiosk (Guided Access)
Section titled “Step 4: Lock the iPad to the kiosk (Guided Access)”Only iPadOS can lock an iPad into one app. Do this once per iPad.
- Settings, Accessibility, Guided Access: switch on.
- Passcode Settings, Set Guided Access Passcode. Staff only. Face ID or Touch ID is fine.
- Open NixDent Kiosk, then triple-click the top or side button (the Home button on older iPads).
- Tap Options and check: Keyboards on, Touch on, Motion off, Time Limit off.
- Tap Done, then Start.
To get out: triple-click, enter the Guided Access passcode, tap End.
Guided Access doesn’t survive a restart. If the iPad restarts, reopen the app and turn Guided Access on again. If you have several iPads, ask your IT provider about Single App Mode for NixDent Kiosk, which relaunches the app after a restart. Keep the keyboard allowed.
Set a staff PIN (optional)
Section titled “Set a staff PIN (optional)”A staff PIN lets your team reset a kiosk from the iPad itself.
- In the iPad Kiosks card, click Set PIN (or Change PIN). The line above it reads “Staff PIN to reset a kiosk from the iPad itself”.
- Type a New PIN (4 to 8 digits) and save. The card then says the PIN is set.
Remove a kiosk
Section titled “Remove a kiosk”In NixDent, click the trash icon (Remove this kiosk) next to the room. The iPad goes back to the code screen. To use it again, add it again with a new setup code.
Common problems
Section titled “Common problems”“Could not reach NixDent.” Check the iPad’s Wi-Fi and internet.
The code says invalid. Codes work once and expire after 30 minutes. Make a new one.
A “Reconnecting” badge stays on. Wi-Fi dropped. The kiosk reconnects by itself. If it stays offline, check Wi-Fi and the plug.
What to do next
Section titled “What to do next”- Learn how to use the kiosk with patients.