

Find a patient
Who can do this: Everyone on your team. Taking a payment needs the Owner, Office Manager, Billing or Front Desk role.
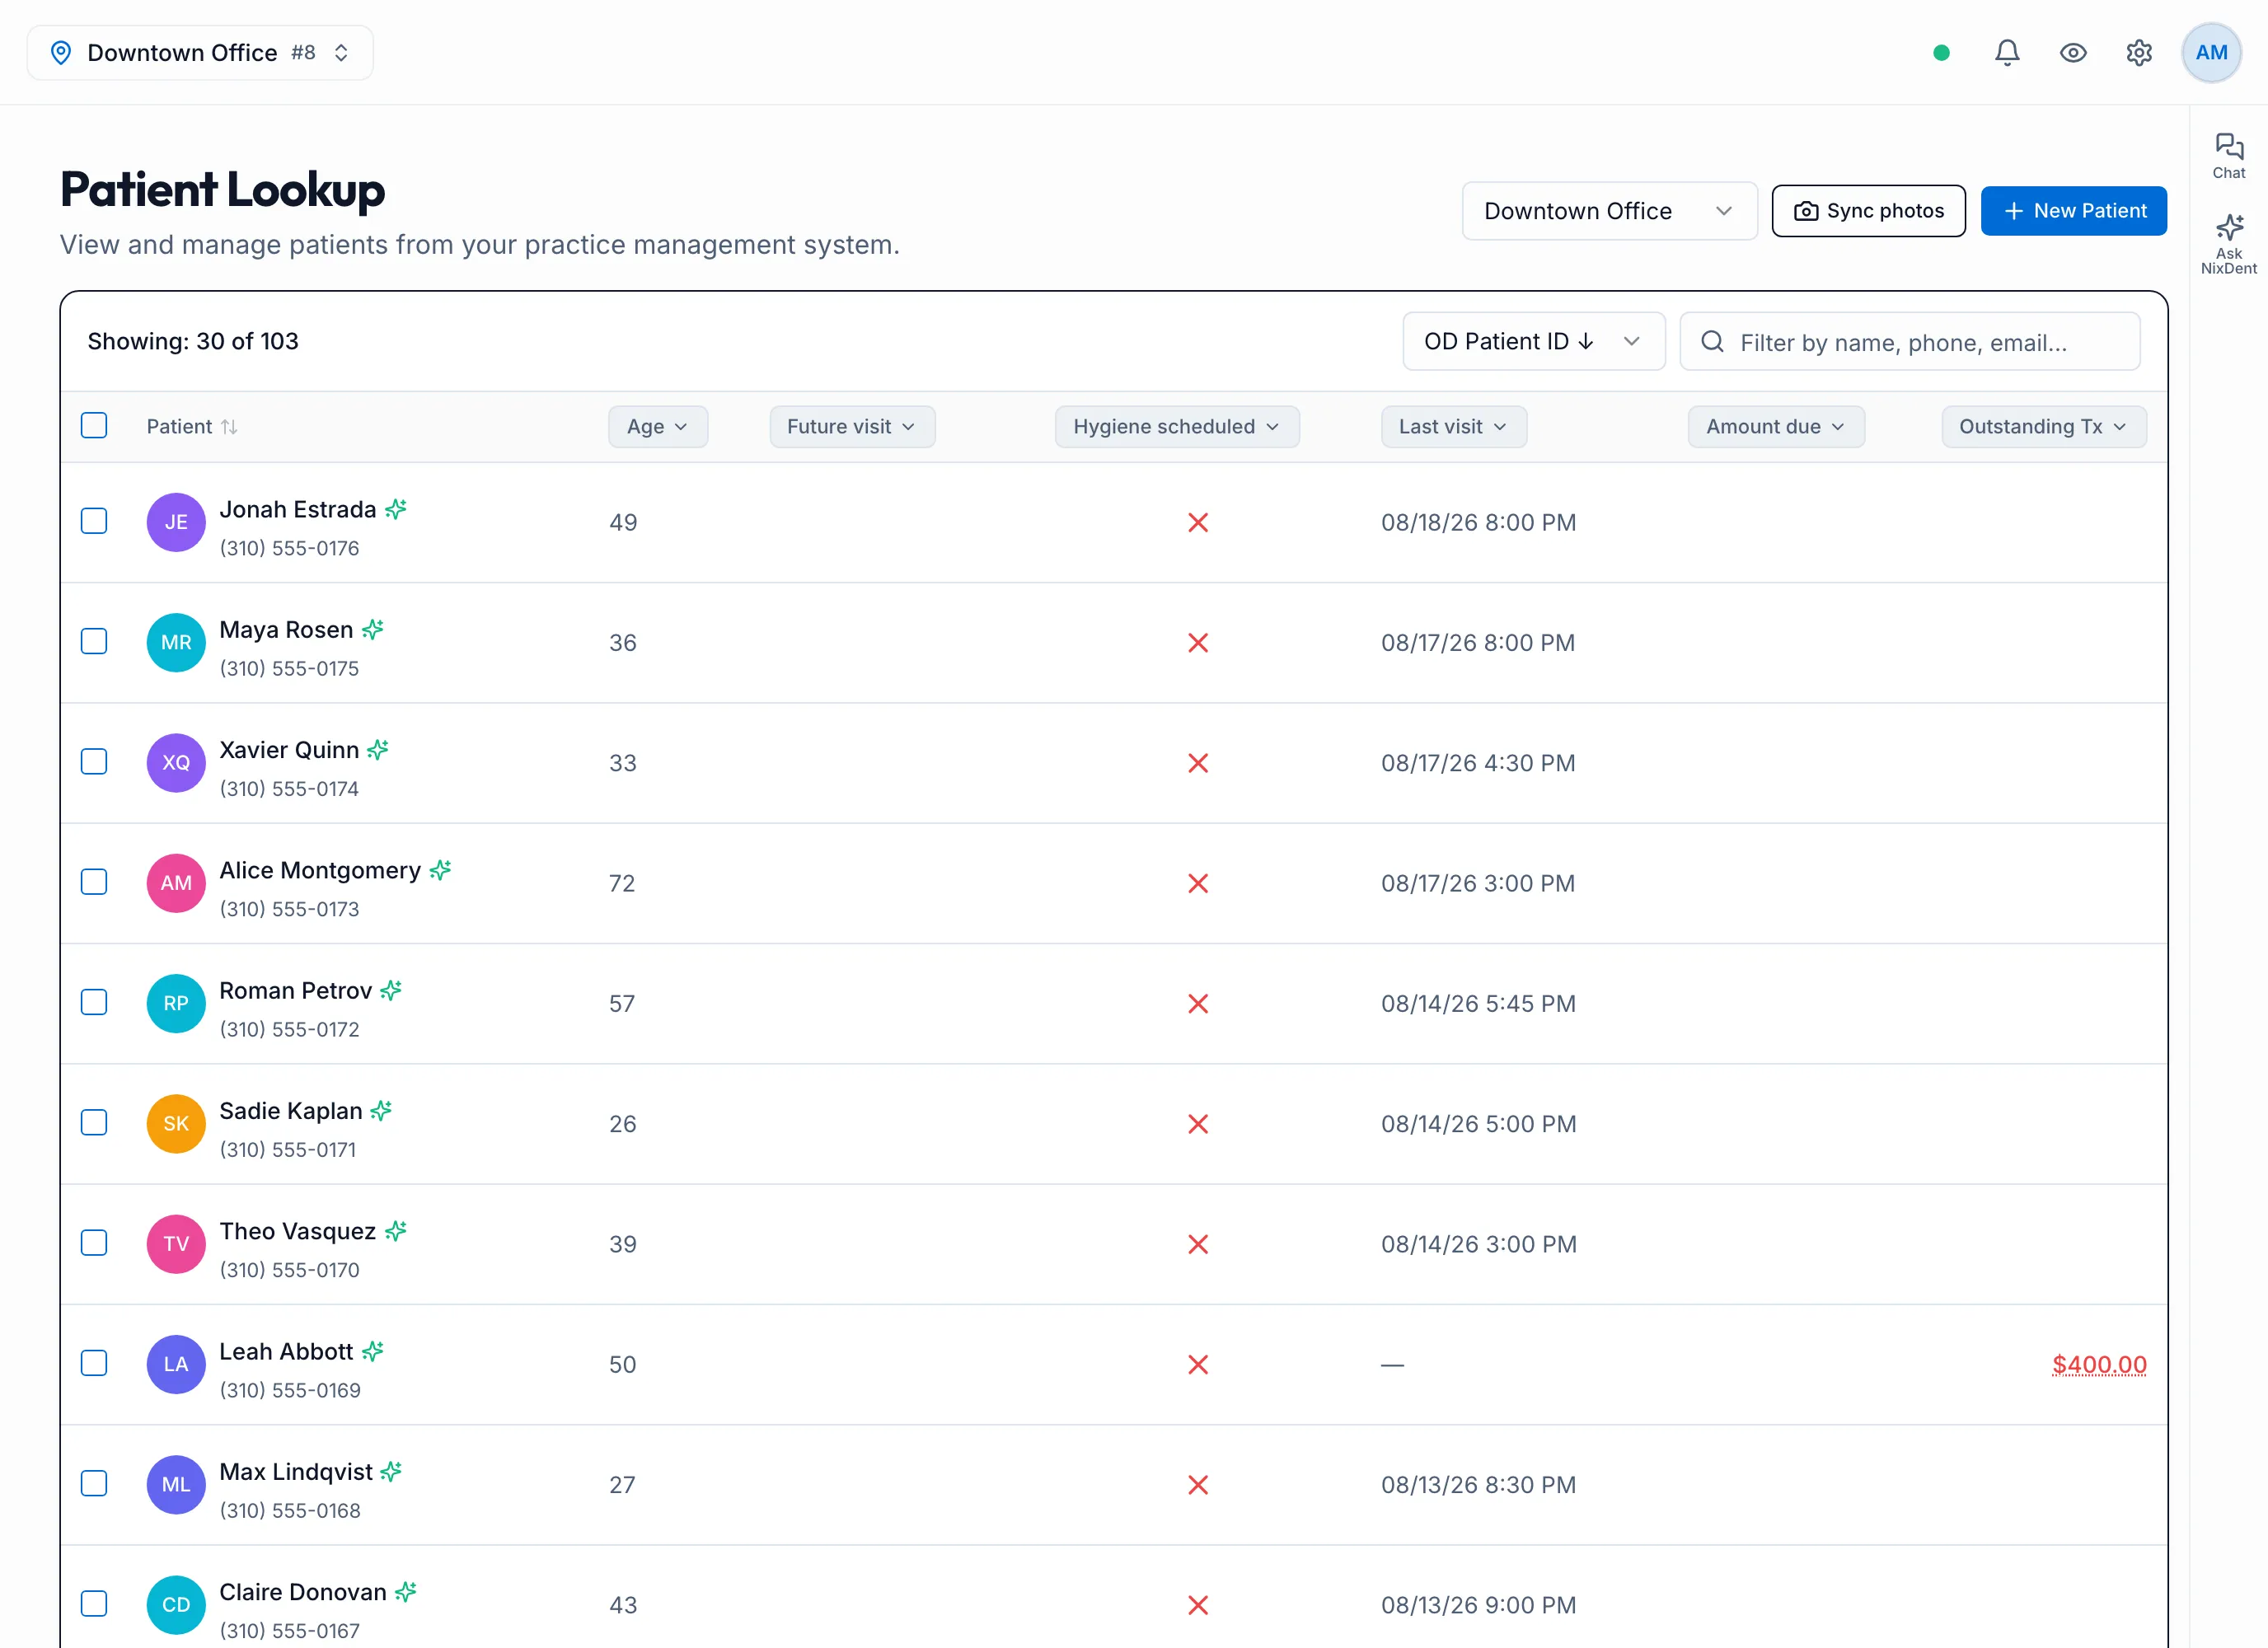
Click Patients in the left menu. The page is called Patient Lookup and lists the patients from Open Dental for the office you’ve picked. With more than one connected office, the page also has its own Select Location menu at the top right.
If your office has no data connection, the page says No Data Connection and asks you to connect a location to NixDent Sync in Settings.
Search and filter
Section titled “Search and filter”- Type in Filter by name, phone, email… to search.
- Change the order with the sort menu: Newest first, Last name A–Z or OD Patient ID ↓ (the page opens on this one, highest first).
- Narrow the list with the filters in the column headings. Click a heading to open its menu. Each menu has All at the top and Clear filter at the bottom once a filter is on.
- The count at the top reads Showing: N of M, or Matching: N / M when you search or filter. When a filter is on, N filters active - Clear appears. Click Clear to remove every filter.
The column filters are:
| Heading | Choices |
|---|---|
| Age | Type a Min and Max and click Apply, or pick Birthday today. |
| Future visit | Date (Today, Tomorrow, This week, This month), Providers, Secondary Providers, Operatories, or Scheduled / Not scheduled. |
| Hygiene scheduled | Yes, No, or “No - Recall past due”. |
| Last visit | Date (Yesterday up to “Between 6 and 12 months”), Providers, Secondary Providers, Operatories, or Never visited. |
| Amount due | 0-30 days, 31-60 days, 61-90 days, 90+ days, or Outstanding balance. |
| Outstanding Tx | Has treatment plan, No treatment plan, Search by code (such as D4341), or an amount range. |
Scroll down to load more patients. The footer reads Scroll to load more with the count, then All M patients loaded.
Small icons beside a name flag a new patient, a minor, an inactive patient, a missing phone number or a missing email address. Hover over an icon to see what it means. A red Blacklisted tag means do not contact. See Communication preferences and do not contact. The Do-not-contact list button at the top right opens the list of patients who are blocked from contact.
Open a patient
Section titled “Open a patient”Click a patient’s row to open their patient card.
Act from the row menu
Section titled “Act from the row menu”Click ⋮ at the end of a row. Items that need a phone number are greyed out when the patient has none.
| Menu item | What it does |
|---|---|
| Schedule Appointment | Find an open slot and book it. See Other ways to book. |
| Treatment Plans | Opens the patient’s card on the Tx tab. |
| Communication → Send SMS | Text the patient. Pick a quick template (Direct message, Invite to schedule or Payment reminder) or write your own, then click Send. |
| Communication → Send Review Request | Texts the patient a link to review their visit. See Ask patients for reviews. |
| Communication → Send Scheduling Invite | Sends the Invite to schedule text straight away. |
| Send Form | Send the patient a form. Shows Not enabled if your practice doesn’t use NixDent forms. |
| Take a payment | Send a payment request, run the card terminal, key a card, set up a payment plan or charge a card on file. See Take a payment. |
| Comm Preferences | Opt the patient out of texts, email, review requests or automation, or blacklist them. See Communication preferences and do not contact. |
Texts go from your office’s texting number, so the patient’s reply comes back to Messages.
Send a broadcast to a group
Section titled “Send a broadcast to a group”Tick the boxes beside patients (or the box at the top to pick the whole page). A bar at the bottom reads “N patients selected” with two buttons:
- SMS / email campaign sends the selected patients to the Broadcasts page. See Send a broadcast.
- Do not contact blocks the selected patients from contact. It asks you to confirm first.
When the whole page is ticked, the bar offers Select all matching patients to take every match across all pages. Blacklisted patients are left out. Click the X to clear the selection. Blacklisted patients can’t be ticked.
Add a new patient
Section titled “Add a new patient”- Click New Patient.
- Fill in First Name, Last Name, Provider, Phone and Date of Birth. Email is optional.
- Click Create Patient.
The patient is added to Open Dental, so you can book them straight away.
Photos
Section titled “Photos”Click Sync photos to pull patient pictures from Open Dental. They appear over the next few minutes. To add or change one patient’s photo, click their picture on the patient card.