

View the schedule and book an appointment
Who can do this: Everyone on your team.
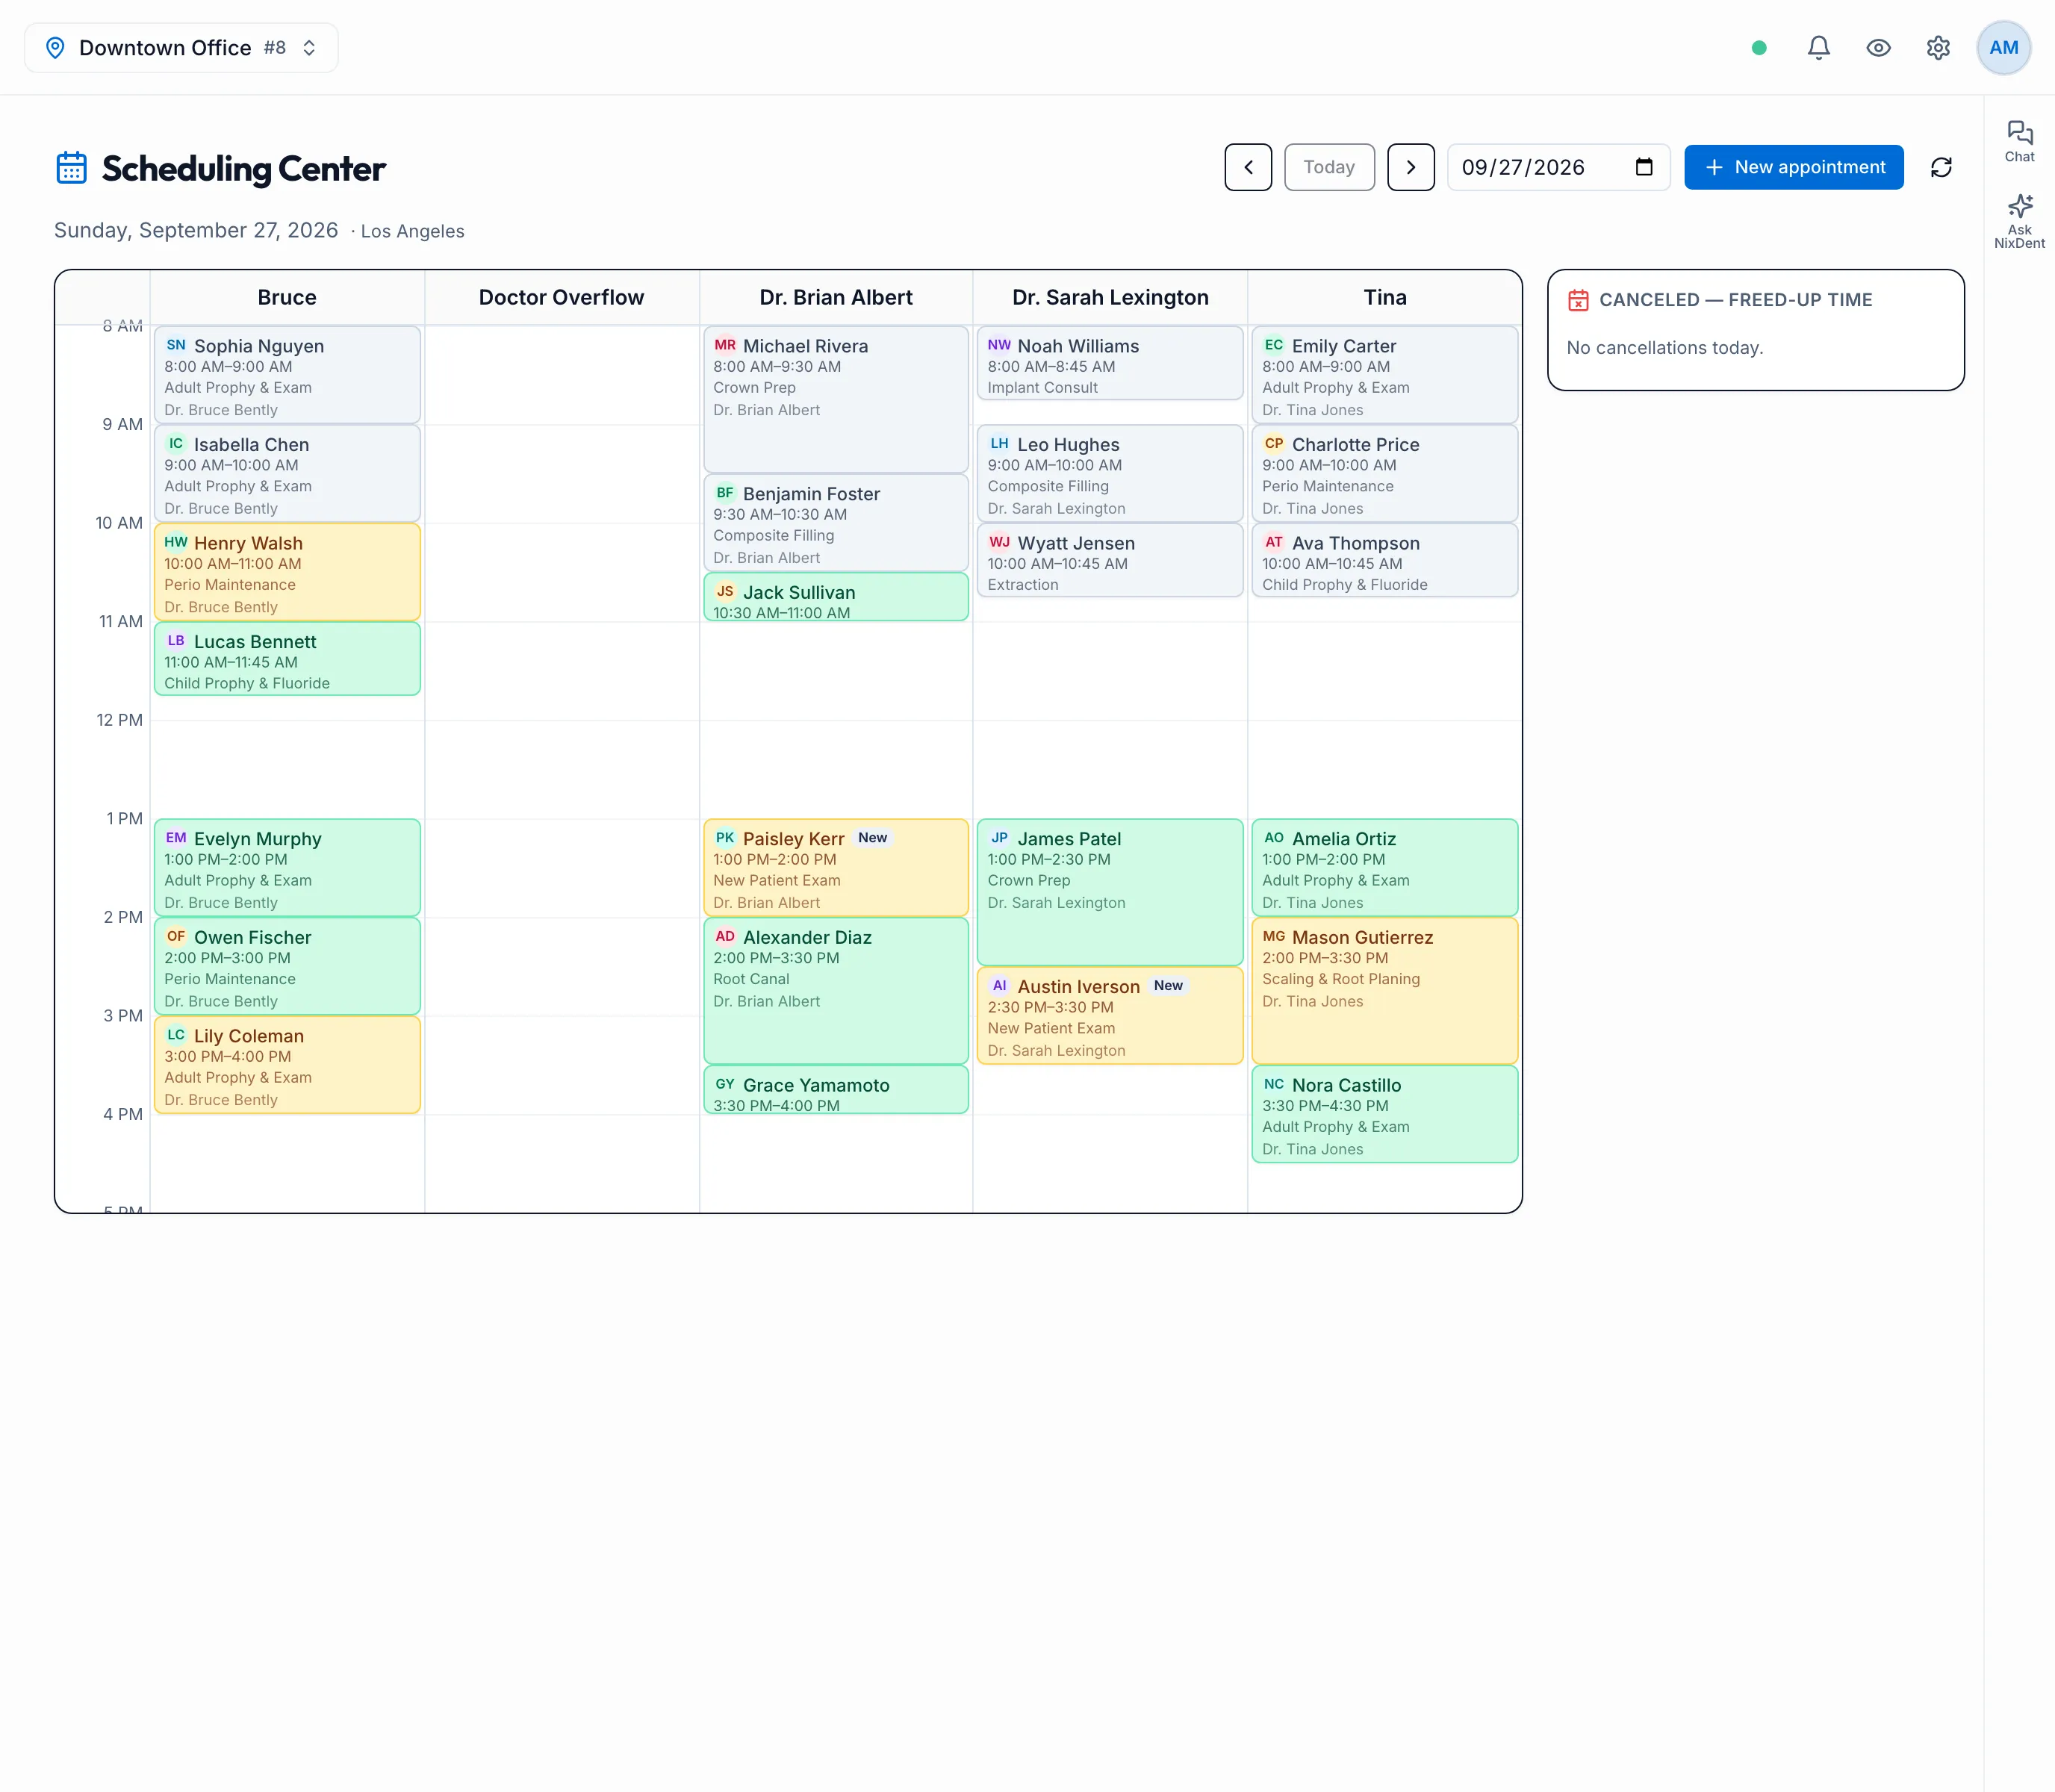
Click Schedule in the left menu. The page is called Scheduling Center.
Pick one office in the location picker at the top left. With All Locations picked, the page asks you to choose one.
Read the day
Section titled “Read the day”- Each column is an operatory (room) from Open Dental. Time runs down the left.
- Each block is an appointment, showing the patient, time, and (on longer blocks) the procedure and provider.
- Green: confirmed.
- Amber: not confirmed yet.
- Grey: completed.
- A New tag marks a new patient.
- Click a patient’s name to open their patient card.
- Canceled — freed-up time on the right lists the day’s cancellations and no-shows. Their time is open again.
- Unassigned operatory lists appointments that aren’t in any room shown.
Rooms hidden in Open Dental don’t show as columns. The grid hours are your open hours, widened if an appointment falls outside them. An appointment with no end time is drawn as 30 minutes, and a very short block (15 minutes) is cut off, so open the patient card for the full detail.
Use the arrows, Today, or the date box to move between days. The day and time zone are your office’s, even if you’re working from somewhere else. Click the refresh icon to reload the day.
Attendance scores
Section titled “Attendance scores”If your office has switched on Attendance scores on the schedule, each appointment also shows how likely the patient is to come: Usually comes, Typical or Worth confirming. Owners and Office Managers switch this on in Settings → Practice → Offices, under Office features. It needs enough no-shows recorded in Open Dental to mean anything.
Book an appointment
Section titled “Book an appointment”- Click an empty space in a column. A line shows the time you’re pointing at, in five-minute steps. Or click New appointment at the top and choose the time and operatory yourself. The New appointment button is greyed out if the office isn’t connected to Open Dental.
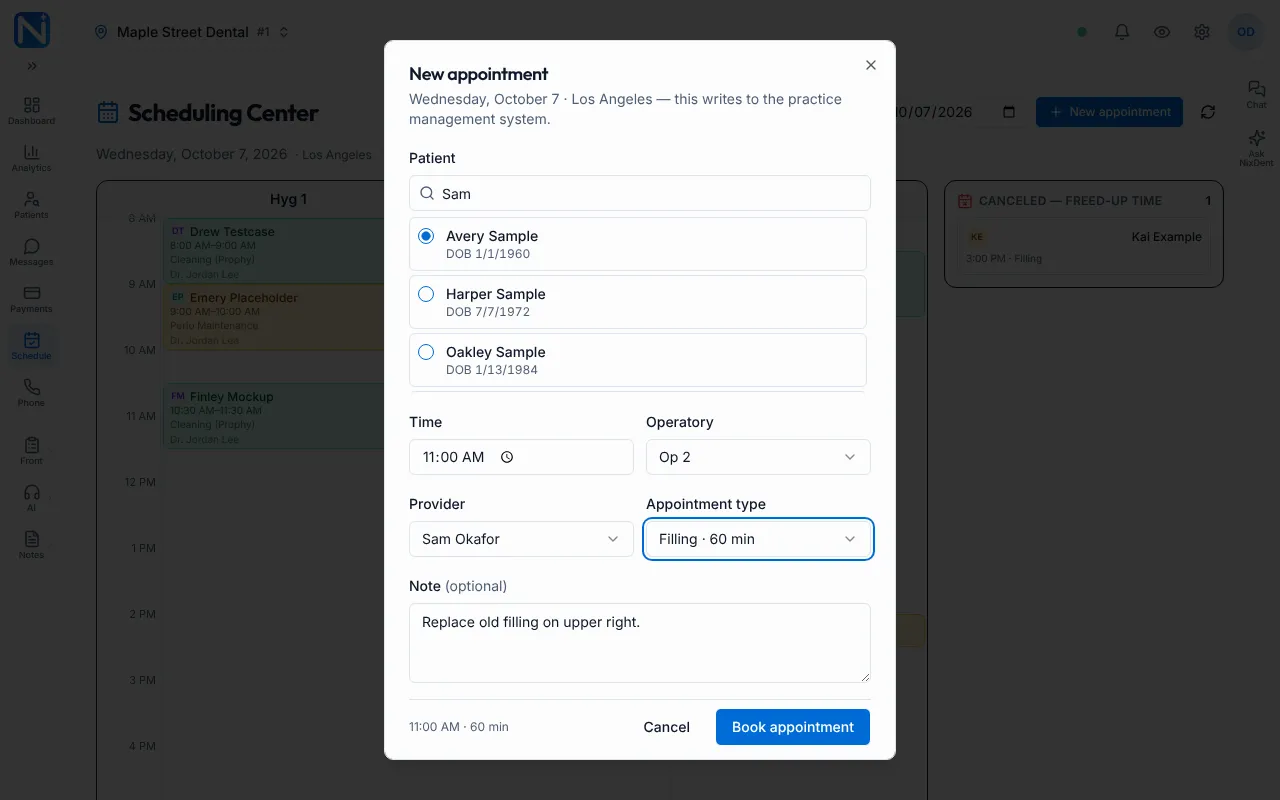
- In Patient, start typing a last name, then pick the patient from the list. Check the date of birth shown under each name.
- Check Time and Operatory, and choose a Provider.
- Choose an Appointment type if you like. It sets the length (the list shows each length); without one, the appointment is 30 minutes.
- Add a Note if the chair needs to know something.
- Click Book appointment.
The appointment is sent to Open Dental and shows on the grid once it’s there. Its note in Open Dental ends with Created by NixDent (NixDent App).
The Scheduling Center is for your team, so it offers every room and provider, not only the ones in Booking rules. Patients and the AI only get the rooms and providers in Booking rules. NixDent checks that the same room is free at that time. Check provider availability and closed days yourself.
If someone else just took that slot, you’ll see That operatory is already booked at that time. Refresh the day and pick another time.
Reschedule or cancel
Section titled “Reschedule or cancel”Move or cancel appointments in Open Dental. The change shows in NixDent after it syncs.
The AI receptionist can reschedule or cancel for callers only if your office allows it. See What the AI receptionist knows and may do.
Other ways to book
Section titled “Other ways to book”- From the patient list: in Patients, open a patient’s ⋮ menu and click Schedule Appointment. Pick a provider, click Find Available Slots, pick a time, then Confirm Booking. It only offers times in the rooms allowed by your booking rules.
- From the patient card: click Schedule. On the Patients page this opens the same slot finder; from most other pages it takes you to the Scheduling Center.
“This location isn’t connected to Open Dental yet” means the office has no Open Dental connection, so there’s nothing to show or book. “No operatories found for this location.” means Open Dental has no visible operatories synced yet. See How NixDent connects to Open Dental.