

Offices
Who can do this: Owners and Office Managers can change these. Everyone else can look.
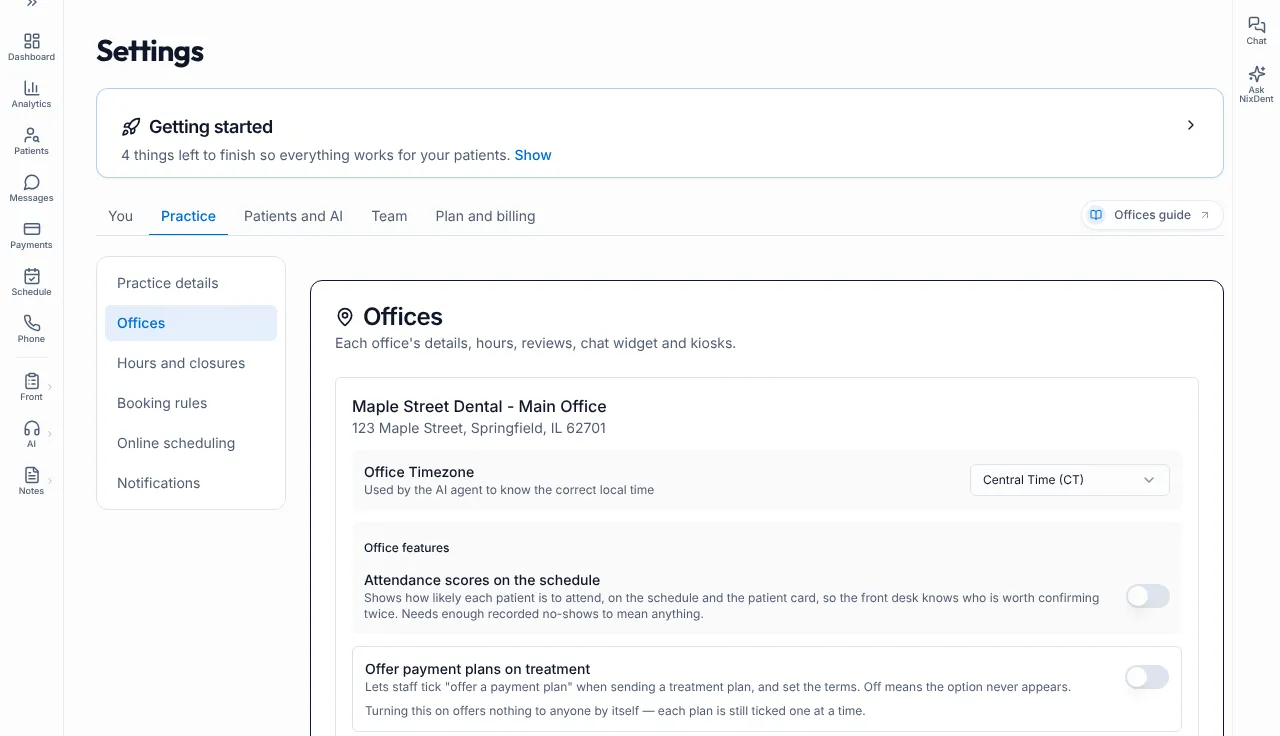
Go to Settings → Practice → Offices. You see one block per office.
Adding an office
Section titled “Adding an office”You can’t add or delete an office yourself. NixDent does it, because each office needs its own Open Dental link, AI receptionist and phone number. Use Request or contact NixDent support.
The office name and address appear at the top of each block. They are shown for reference and cannot be edited from this page, by anyone at the practice, including the Owner. This address is the one the AI gives callers. To change the office name or address, ask NixDent with Request and say what it should read. The address in Practice details → Practice Setup is a different one and does not change this.
A practice that NixDent has not yet given an office sees “No offices set up yet.” here.
Office time zone
Section titled “Office time zone”Office Timezone is used so the AI knows the correct local time. Choose Eastern, Central, Mountain, Arizona (no daylight saving), Pacific, Alaska or Hawaii. It saves as soon as you pick.
Office features
Section titled “Office features”| Switch | What it does |
|---|---|
| Attendance scores on the schedule | Shows how likely each patient is to attend, on the schedule and the patient card, so the front desk knows who is worth confirming twice. Needs enough recorded no-shows to mean anything. |
| Ask NixDent | Only appears if Ask NixDent is on your plan. Adds “Explain this” to reports so you can ask about your own numbers in plain English. It reads your data and can save a patient list for a campaign. It never contacts anybody. Give it to others in Settings → Team → Edit roles. See Give someone Ask NixDent. |
| Offer payment plans on treatment | Lets staff tick “offer a payment plan” when they send a treatment plan, and set the terms. Off means the option never appears. Turning it on offers nothing to anyone by itself. Each plan is still ticked one at a time. |
Hours, closures, rooms and the AI
Section titled “Hours, closures, rooms and the AI”The block has shortcuts to the pages where those live:
- Hours and closures opens Hours, holidays and closed days.
- Booking rules opens Booking rules.
- AI Receptionist opens What the AI receptionist knows and may do.
Review request settings
Section titled “Review request settings”Review Request Settings sends patients a request to review you after a visit.
- Switch it on. The label changes from Disabled to Enabled.
- Set Send review request after appointment (hours). It accepts 1 to 720.
- Add at least one Review Platform Links address: Google, Yelp or Facebook.
- Click Save Review Settings. A message says “Review settings saved”.
The checklist flags review requests as missing if they are off, or if they are on with no link.
Website chat widget
Section titled “Website chat widget”If the chat add-on is on your plan you see Chat Widget controls. If not you see “Website chat widget — an add-on NixDent turns on for your practice” and a Request button. See Put the chat widget on your website.
Check-in tablets (iPad kiosks)
Section titled “Check-in tablets (iPad kiosks)”Each office block ends with an iPad Kiosks section. You create the kiosk in NixDent, never on the iPad.
- Click Add kiosk, type a Room name (for example “Front desk”) and create the code.
- NixDent shows a large Setup code once, with a countdown (“Expires in m:ss · works once”). It can’t be shown again. Click Copy if you need it.
- On the iPad, open the NixDent Kiosk app and enter the code.
- Click Done. The kiosk shows in the list with whether it is online. Click the remove button next to it to unpair it (“Kiosk removed”).
Under the list, Staff PIN to reset a kiosk from the iPad itself shows not set until you click Set PIN.
If a code expires (“Expired — create a new code”), create another.
Common problems
Section titled “Common problems”Switches are greyed out. You don’t have permission, or NixDent has locked the setting for your office (“Locked by NixDent for this office”).
I changed a setting and the AI still says the old thing. Settings that affect the AI update it automatically within seconds. If you saw “Saved — AI receptionist not updated yet”, go to Settings → Patients and AI → AI receptionist and click Update AI now.